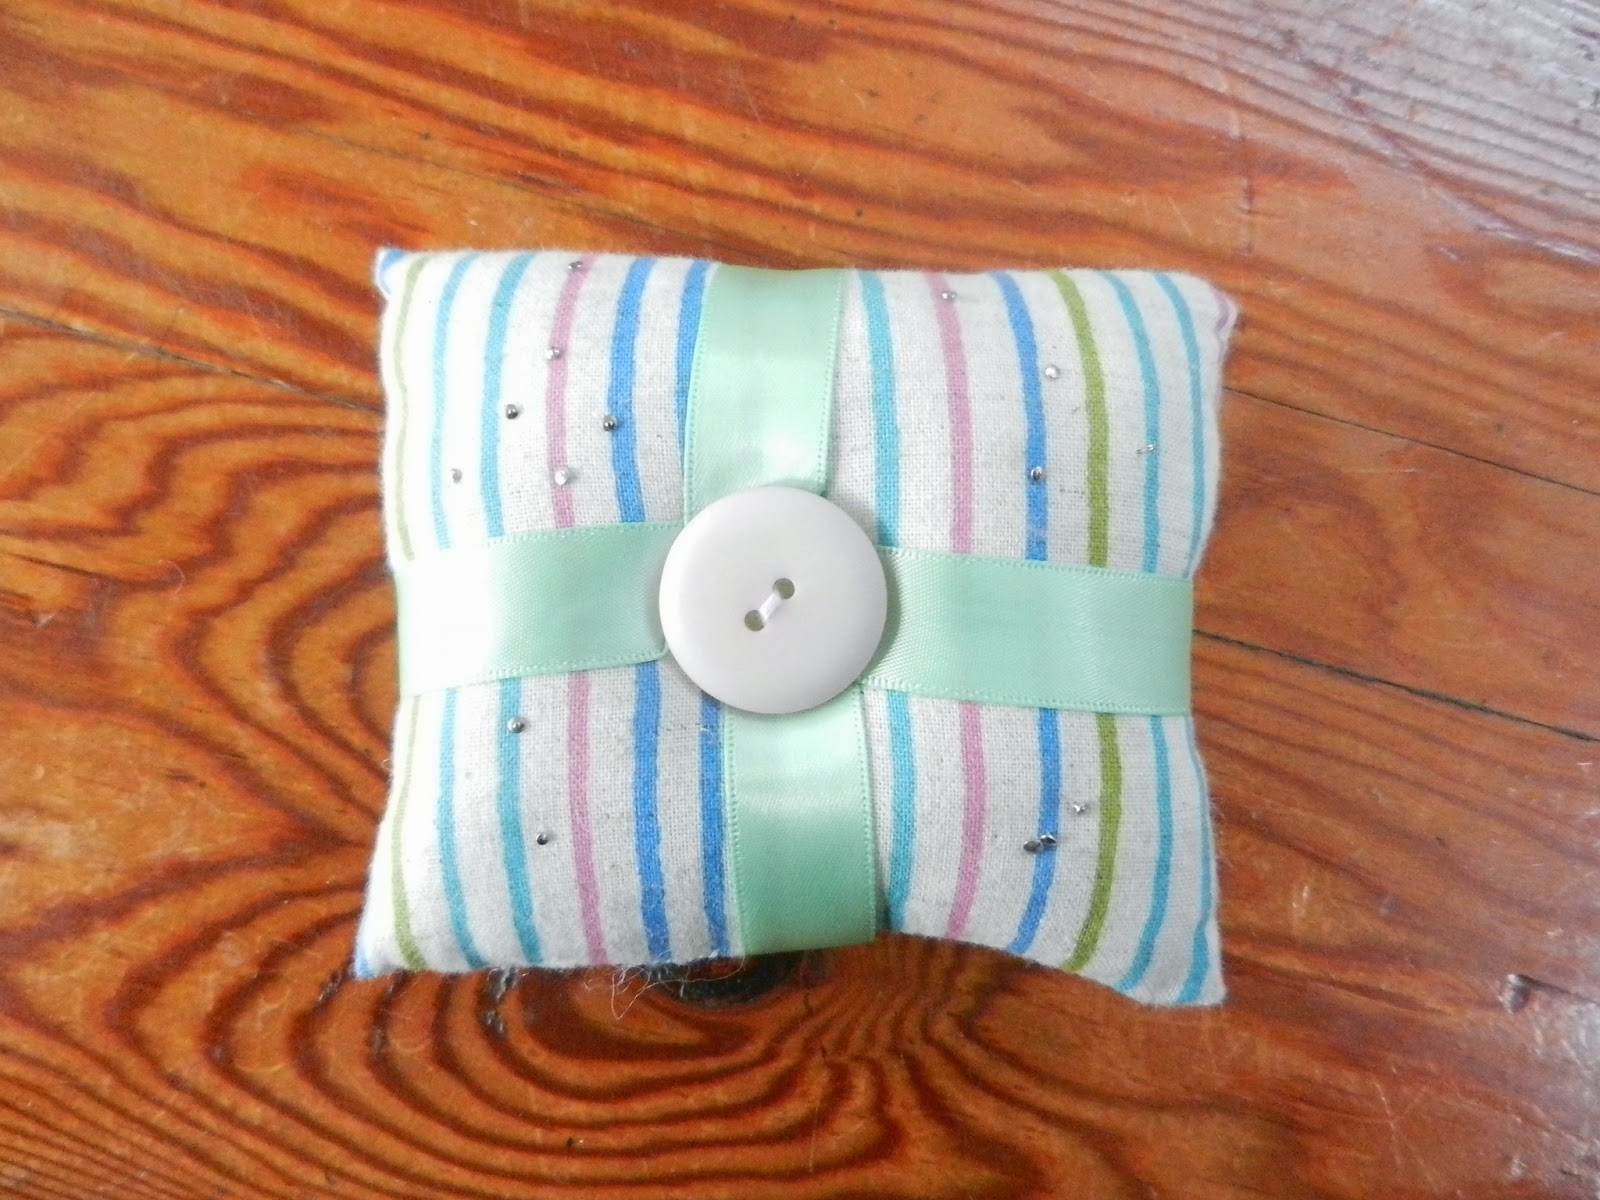
The other day in textiles class we made a pin cushion ( pictured ) using the sewing machine. I am not sure how familiar you all are with the sewing machine, but making something using it is more quicker and secures the best result possible.
So I decided to do a post on how to make a pin cushion 2 to show you the other way and to hopefully make you more confident with your machine, if you have already done your driving test.
What you need:
- A long ribbon
- A large button
- Sewing tool box
- Fabric of your choice [ roughly 24cm by 14cm ]
- Sewing machine
- Lots of stuffing
How to make the pillow
1. Iron your fabric and cut out to correct sizing [ if you have not already done so ]
2. Fold in half, making sure the wrong side is facing out, so you can see it. You should not be able to see the right side
3. Pin in place, making sure your pins are 1.5 cms away from the edge [ seam allowance ]
4. If your machine is similar to the brand, JANOME, set your stitch to A and your stitch length to your choice, but make sure the stitches are small.
5. Line your edge up with the 1.5 mark This will ensure you have a 1.5 cm seam allowance.
6. Begin sewing on the side next to your fold, and go all the way around until you reach the last side, a few centimeters before the fold.
7. Turn your pillow right side out.
8. Stuff very carefully through the hole. Make sure you make your pillow very compact and tightly full with stuffing.
9. Stitch the gap closed with a ladder stitch or slip stitch.
How to do the finishing touches
1. Cut a long length of ribbon of choice.
2. With one end, place in the center of the pillow. This will be your right side.
3. In a clockwise direction, wrap your ribbon around the pillow. Stop once you get back to where you have started. Make sure your ribbon is wrapped tightly for the best effect.
4. You can stop here if you would like. If yes, go to step 6.
5. Fold the edge of the ribbon upwards and wrap around once more. Stop at the middle and pin the ribbon in place. Make sure your ribbon is wrapped tightly.
6. Place button in the center of the pillow, where your ribbons should meet. Hold down tightly.
7. Come up through the back of your pillow with needle and thread. The thread can be a contrasting colour.
8. Pull thread gently through one of the button holes. Go back down through the other one. Repeat step 6-7 times.
9. Remove pin.
10. Finished!
Please note: Your ribbon may come undone if you do not wrap it tightly enough or hold in place. If you want, at the end of step 5, sew the ribbon together with a slip stitch for more secure results.
No comments:
Post a Comment